Consider the size of the room because the fan blades need to be proportionate to the area to circulate air efficiently. Smaller rooms under 75 square feet might only require a fan with 29–36-inch blades, while larger spaces over 400 square feet need fans with blades 52 inches or longer.
Being the fan, first make sure that you have all the necessary tools ready: a ladder, a screwdriver, wire cutters, wire strippers, electrical tape, a voltage tester, and possibly a drill. By having them on hand, you’ll avoid wasting time and becoming frustrated later. Look next at the ceiling box where the fan will be mounted. The manufacturer must have rated it as suitable for ceiling fans. These are heavier than light fittings and have a dynamic load. If you’re replacing an existing light fitting, the box may not be suitable for a fan. If necessary, replace the existing box with one that is made to support a ceiling fan.
Find the ceiling joists, the main structural supports in the ceiling. The ceiling fan must be mounted directly on one of these joists or on a fan brace that spans between joists. If you’re unsure about the integrity or strength of the existing mount, it’s safer to install a new support bracket than to do something unsafe.
Turning Off Power and Testing for Safety
Start by turning off the power to the room where you’ll install the fan at your home’s circuit breaker. To avoid electrical shock or injury while working with the wires, this step is vital.
After you switched off the breaker, double-check that the power is off by using a voltage tester. Where you will be connecting the fan, test the wires to make sure there is no electricity present. This extra caution might seem like overkill, but it can protect you from hazards. Never skip testing, even if you’re sure the breaker is off.
If you don’t own a voltage tester, they are relatively inexpensive and widely available at hardware stores. They come in handy for many electrical projects around the house, so investing in one is smart.
Removing the Old Fixture and Preparing the Mount
If you have an existing light fixture or an old ceiling fan, you’ll start by removing it carefully. Unscrew the fixture base and disconnect the wires, one pair at a time. Take note of how the wires connect—usually, it involves black or red wires for live, white for neutral, and green or bare copper for ground.
After removing the old fixture, take another look at the mounting box. Make sure it’s sturdy and fan-rated. If it’s not, install a new ceiling fan support brace. The braces either fit between joists or can be retrofitted through the ceiling hole. They’re necessary to prevent the wobbling or falling of the fan over time.
Use the screws and hardware from your fan package to fix the bracket securely to the ceiling box or fan brace.
Understanding the Wiring and Making Safe Connections
Connecting the wires for a new ceiling fan might seem challenging, but it becomes simple if you work carefully and focus on the details. First, compare the wires on the fan with those coming out of your ceiling. Generally, the color codes are:
Black or red = Hot (live)
White = Neutral
Green or bare copper = Ground
Some fans include extra wires for lighting or a remote control, so check the fan’s instructions.
The first step is to connect the ground wire, which is built into the fan, to the ground wire in the electrical box. In terms of safety, ground connections will prevent an electric shock should a fault occur. Wrap the two ground wires around each other and fasten them using a wire nut.
Join the neutral wires (white to white). Make sure no exposed wire is visible beyond the wire nut. Next, connect the hot wires (black from the ceiling to black from the fan). If your fan has a light kit with separate wires for it, look for red wires or instructions from the manufacturer and connect accordingly.
After you’ve paired and secured each wire with a wire nut, wrap electrical tape around the connection. This will help maintain tension on the wire nut and add another layer of protection.
 Attaching the Fan and Final Assembly
With the wiring complete, carefully tuck the wires back into the box. Now you’re ready to hang the fan motor onto the mounting bracket. Most fans use a hook or a slot system to temporarily hold the motor while you connect the blades.
Secure the fan according to the instructions provided by the manufacturer. If your fan includes a downrod, you have to connect it, tighten the screws, and hang the fan level.
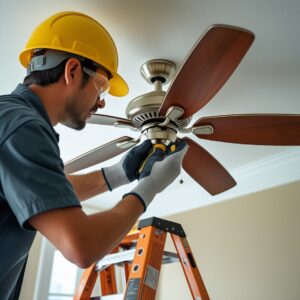
Using screws, fasten the blades to the motor arms. Make sure each blade is tightly secured and the spacing between blades is even.
If your fan has a light kit, install it last. Make sure any bulbs and covers are installed safely.
Put on the fan canopy — the decorative cover that hides the mounting hardware and wires — for a clean finish.
Testing Your New Ceiling Fan
Once the fan is securely mounted and all connections are tightened, restore power at the circuit breaker. Then, operate the fan and light by pulling the chains, using the wall switch, or the remote control. Start low speed and listen for strange noises or wobbling.
If you hear rattling or the fan seems unsteady, it might need blade balancing. Most ceiling fans come with a balancing kit—small weights you attach to blade edges to eliminate the wobble.
From the floor or on a step ladder, look at the fan and make sure it spins evenly without excessive movement.